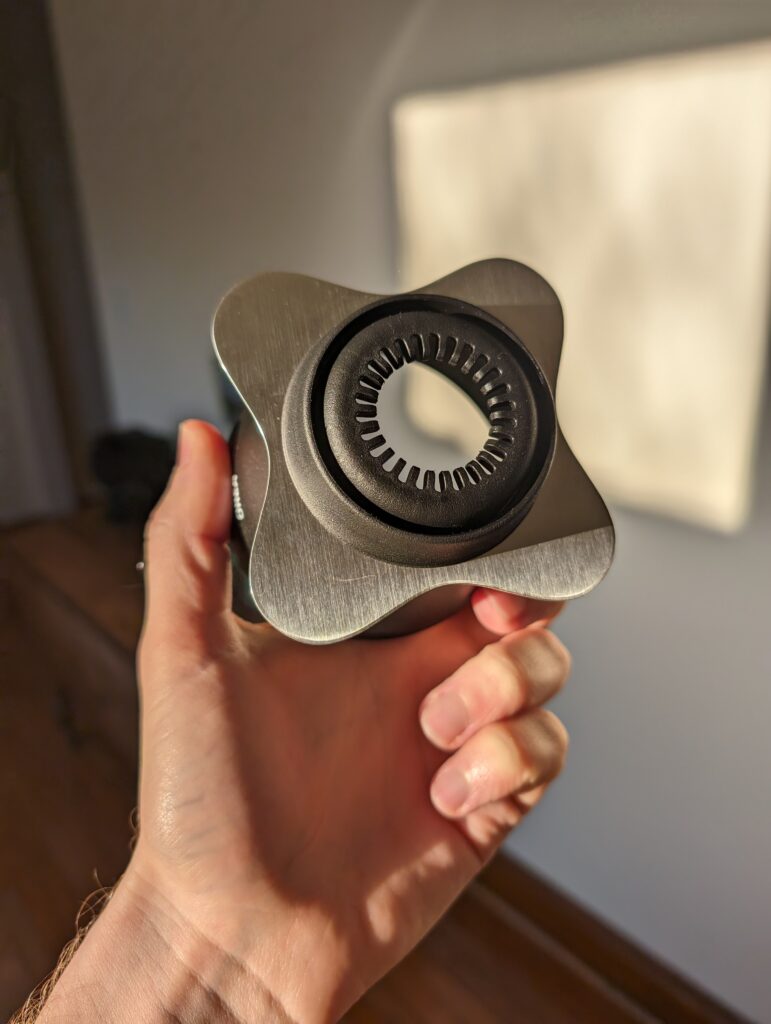
I recently got the Orea v4; learning that brewer reminded me of why, even after so many years of brewing coffee, a big variable change forces you to re-learn the fundamentals. And why it’s always best to let taste be your guide.
the frustrations of learning something new
One of the most satisfying aspects of home coffee brewing is feeling like you have your coffee perfectly dialed in. But when you get a new brewer (or grinder for that matter) everything gets shaken up. The muscle memory and confidence you built is reset. And that’s jarring.
I’ve gone through this a few times now, so I wanted to share my tips on navigating a new brewer. And why, although it can be frustrating, it’s an experience that will improve your skill as a home coffee enthusiast.
The key is to let taste guide your decisions.
where to start
With a new brewer, I recommend either, using a recipe that has worked for you in the past, or following one from someone who’s tastes align with yours.
Either can work but it’s important that you have a specific starting point. If you try and use every tip, trick, and bit of advice you read online, you’re going to have conflicting brewing philosophies butting up against each other.
If possible, start with a coffee you know well. Something you’ve successfully brewed before, even better if you’ve cupped it. That way you have a baseline for how it should actually taste.
Ensure the coffee is well rested, at least two weeks for light roasts, to rule out any undesirable tastes from it being too fresh.
brewer design
Consider the design and philosophy of the brewer.
The Pulsar, v60, April, and Orea all have different goals they’re trying to achieve. If you have the mindset of a zero-bypass brewer but are applying that to a v60 (which inherently always has bypass) you’re going to get confused fast.
Additionally, the physics of each brewer is different. A steeper angled brewer will drain faster than a wider one because the water column is higher. So, don’t expect to have the same flow rate or brew times on both.
an aside against accoutrements
This is why I wonder if the modern, swiss army knife brewers, are actually useful. It’s fun, as an enthusiast, to have 100 options in one brewer but that’s also super overwhelming. I’m not sure if I want to learn and perfectly dial in every base on the Orea v4. It’s neat that they exist but I don’t think I need (or want) all of those variables.
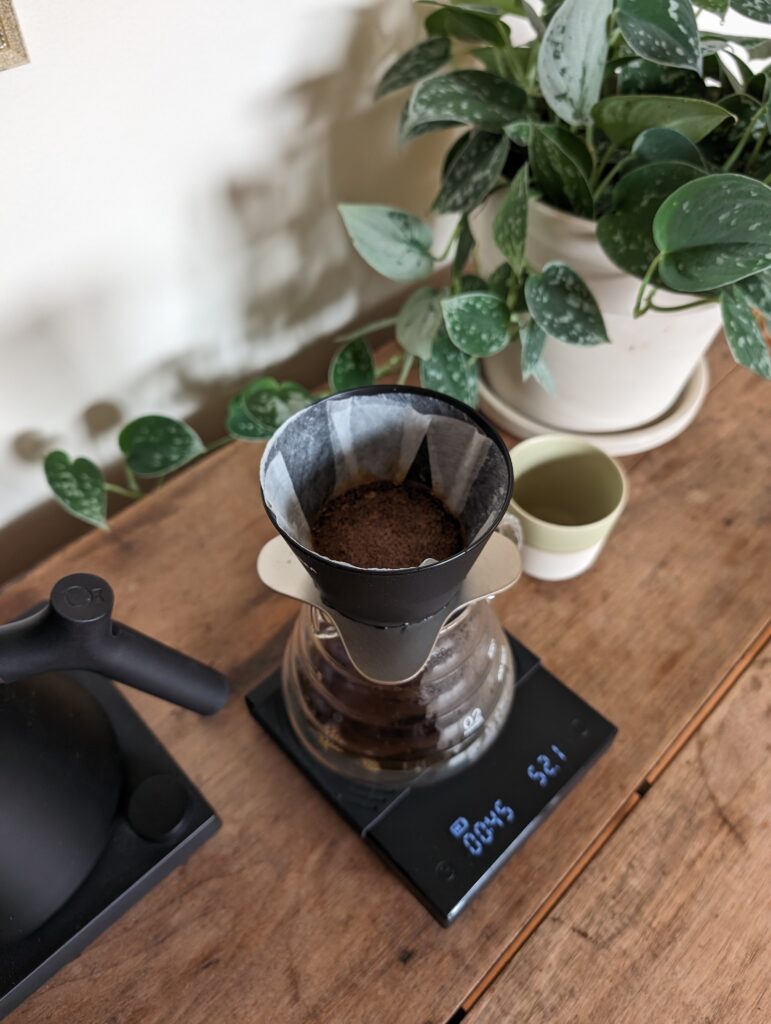
grind size
Grind size is frustrating.
It’s really hard to communicate it to someone in writing or even photos for that matter. And two models of the same grinder won’t produce identical grinds at the same setting. If someone says they grind at a 4 but their calibration is much different than yours, you’re going to be pulling your hair out for no reason.
Any grinder will produce a range of particle sizes; instead of just looking at the grinds, I find it useful to feel them between two fingers. Finer grind settings will feel more like sand and coarser settings will feel more like small individual pebbles.
Unless you know that you need to go much coarser or finer for your new brewer, I suggest starting out with what you previously used, and then adjusting from there.
Personally, I find it easier to start coarse and then go finer until I hit the sweet spot. If you start quite fine, that can cause channels or muted brews that taste both under and over extracted.
This makes diagnosing problems by taste really tricky. Especially with light roasted coffee that, at least to me, never really tastes “bitter” in the way you would expect. If you’re using a really lightly roasted coffee, no matter how fine you grind, you may never taste “roasty or bitter” flavors. I usually experience muted cups or a drying sensation when going too fine.
And don’t be afraid to go much coarser than you see people use online. Just because your grinder says 4-7 is “pourover range” doesn’t mean you can’t enjoy a v60 at setting 9.
bloom
For most pourover methods, I like a long bloom. At least a minute but 90 seconds to two minutes is good too, especially if your coffee is fresher. Anecdotally, I’ve found this helps improve consistency and efficiency of extraction.
So, if you’re using light roasted coffee, I recommend a bloom of at least one minute.
recipe
Take a look at your recipe and consider what it is trying to achieve. Like brewers, each recipe has a different philosophy behind it.
Is it a fine grind low agitation brew? Does the recipe call for coarse grinds and lots of manual agitation, like with a WDT tool? Is it specifically designed around a fast flowing paper filter?
There is no one best recipe, most of them can brew great cups of coffee. But understanding the philosophy of the recipe will help you play by its rules. For example, pouring height and speed is a really important variable in but it’s left out of a bunch of recipes online.
Whatever recipe you pick, keep it consistent. The best approach is to change one variable at a time; if you get frustrated and jump ship to a new recipe every time you don’t like a cup you’ll be running in circles.
the total brew time trap
Total brew time is mentioned a ton online, people say, “My coffee is tasting great but my brew time is a minute longer than the recipe!? What am I doing wrong??” Nothing.
Total brew time is highly variable and in some sense, doesn’t matter. It can vary a ton between coffees, grinders, and brew recipes. It’s most helpful when monitoring your consistency. For example, if the same coffee randomly takes a minute longer to drain, maybe you clogged your filter or forgot set your grinder after cleaning it. But you need to consider the taste of the cup first, before you look at total brew time.
In a similar vein, I always see Reddit posts that are like, “How’s the bed look?” … Who cares!?
You only need to look at the bed after determining there’s something you want to change about the taste of your coffee.
If you’re getting really muted, muddy brews and you notice the bed is covered in layers of fines, and you can physically see channels, then yeah, probably time to grind coarser. But don’t grab the level from your tool box before even tasting the coffee.
questions for your first cup
So, you’ve just brewed your first cup with a new brewer, congrats! Let it cool down and start to taste it.
Notice how it tastes when hot, medium temperature, and cool. How’s the body? And what’s the finish like?
Are you tasting anything you don’t like? Like astringency, unpleasantly sharp acidity, or muted flavors?
How does this brew compare to when you cupped the coffee? And if you’ve brewed it successfully in the past, how does it compare to that?
The answers to all of these questions and more will inform what you change in order to dial in this coffee on this brewer. That last bit is important because each coffee and brewer will require its own set of tweaks.
one thing at a time
Focus on one thing you like and one thing you don’t like about this coffee.
Then, consider what you could change to lessen the negative attribute and get more in line with what you enjoy.
Your first few (or several) cups might be frustratingly bad. That’s okay. It’s like cooking with an oven you’ve never used before. Overtime, you’ll learn the intricacies and how to read the signs of the brewer.
Here’s where I can’t give specific advice. There are so many permutations of what you’re experiencing in your cup. It wouldn’t be helpful to say, “Do this or that”.
But what I can say, is change only one variable at a time. Don’t change the grind size, ratio, and pour height all at once because you won’t know which was a positive change and which was negative.
If your change worked, great! If it didn’t, reset your recipe and try changing a new variable.
fundamentals
If you let taste be your guide and focus on the fundamentals of extraction, you can much more easily dial in any new brewer or coffee.
I won’t attempt to explain the numerous components at play during extraction1 but here is my (very) broad advice:
- More energy (like higher temps or higher agitation) generally brings out more flavor compounds but more isn’t always better
- Center pours usually highlight acidity and circle pours usually highlight sweetness
- More pours produce rounder cups; a single pour is often more tea-like
- Pouring with your kettle high up will cause more turbulence in the coffee bed, until your get so high that the kettle stream breaks up, at which point it’s causing less agitation
- Light roasted, washed coffees can take higher brew temps but with more processing and roast, lower your temps
- Using more water will increase extraction and decrease strength
- Grinding finer has the potential to extract more but makes it more difficult for water to drain evenly through the coffee bed
- Higher agitation can increase the chances of clogging your filter paper especially if you grinder produces more fines
With each cup you’re not happy with, think, “What do I want to change? And what variable can I modify to achieve that goal?”
And I can’t stress enough how useful cupping is in this situation. Having a baseline of what a coffee tastes like, separate from brew method errors, will help you dial in.
If you’re trying everything you can think of to increase the acidity of a coffee but the tasting notes are nutty and smoky, it’s not your brew method, it’s the coffee.
Conversely, if a coffee is perfect and delicious when you cup it but undrinkable when you brew it, that’s on you.
- For that strongly I recommend the wonderful book, The Physics of Filter Coffee by Jonathan Gagné ↩︎